Friday, March 12, 2010

Fix-It Friday

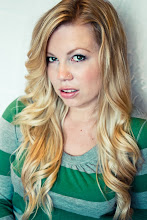
I missed Fix-It Friday last week, so I was eager to participate this week.


I found this week's picture a little hard to edit, but I gave it my best shot!

The Original:


Fix Number 1:


What I Did: First I adjusted the levels, adjust the saturation, used Coffee, Tea, Photographys Little Perk action, screened the image and adjusted the opacity to my liking, then applied CTP Perfect Portrait Action.

Fix Number 2:


What I did: All of the above in slightly different order and then at the end added an additional CTP Sunkissed Action.


Friday, February 26, 2010

Fix-It Friday

It's time once again for Fix-It Friday!


Here is the original picture:


Here are my two favorite edits that I did:

#1


What I did:
Cropped the image,used the quick selection tool to adjust the shadows on the face and arms, inversed the selection to multiply the color of the sky, applied Coffee Tea Photography's Eye Bright Action, applied Coffee Tea Photography's Butterscotch Vintage action.

#2


What I did:
I did everything the same up until the Butterscotch Action, instead I applied Coffe Tea Photography's Vintage Blush action and unchecked the color mute selection. I then copied the layer and used the soft light to accentuate the colors. I also applied a bokeh texture from Flickr.

Hope you enjoyed!


Friday, February 19, 2010

Fix-It Friday

Time again for Fix it Friday!


This weeks original picture:


My edits:


The main thing I did for the first picture was to use the Quick Selection tool to outline the little girl and then once I copied her alone into a layer, I screened the layer, so that she was lighter than the shadows and adjusted the level so that she wasn't too bright.

I adjust the saturation, a little tweaking of the light levels and then used CoffeeShop Photograph's Butterscotch Vintage Action.

Edit Number 2:


All I did in this edit was to add two different textures to the above picture I had already edited. The textures I had downloaded from Flickr

Wednesday, February 3, 2010

Barbed Wire Sunset

I took this while at home over Christmas. I love it because it reminds me of growing up out in the country and how much I love where I grew up.

I used Picnik to edit it, but I'd like to re-edit it when my Photoshop comes in.


Tuesday, February 2, 2010

My Equipment

I've had some of you ask what sort of equipment and editing equipment I use, so I thought a post answering these questions might be a bit easier.

For starters, I use a Canon Rebel XSI aka the Canon 450D.


I highly recommend it! It's a great starter DSLR camera and you can find them for a good price.

I have 4 different lenses I use for my camera. Generally I use the kit lens that came with it the 18-55mm lens.

I also have a 70-300mm lens that is a telephoto lens. I use it a lot when I travel. It's a great lens.


Then there is the 10-22mm lens. It's for wide angle shots. It's great for crowded rooms or if I want to get a large landscape entirely in one picture.


My last lens is my newest and I find it to be the trickest. It's the 50mm f/1.8 lens. It's great for portraits and taking close-ups. I'm still working on getting good shots from this lens.


Now for editing software. I highly recommend Adobe Photoshop Elements. I'll list a few reasons why I like it.

1. It's way, way cheaper than Adobe Photoshop CS4. I just got the new version of Photshop Elements for $50...compare that to over $300 for CS4.
2. Bascially they do the same thing. Unless you are some sort of graphic artist I don't really understand the need for CS4. Not to say it's not an excellent program, because it is. But you can get the same results from Elements that you can get from CS4.

If you do get Photoshop Elements it may seem a little overwhelming at first. Get this book, I promise you won't regret it.


I call it my bible. Seriously..it's that important and it makes using Elements ten times easier for someone who has never used it before.

Saturday, November 7, 2009

Photoshop Actions Take 2

As promised, here is another picture I edited using one of the free actions I downloaded.

I liked this picture, but it seemed just a tad too bright. Nothing wrong with that, but I wanted a different look to it.


So..I did the Vintage Blush action. Perfect!


Wednesday, November 4, 2009

Free Photoshop and Photoshop Elements Actions

I know it's been a long time since I've posted here. I'm hoping with this unemployment period that I can get back to sharing my photos with you guys. Obviously for now I've abandoned the 365 days of photos idea and I'll just be posting pics and links that I think are relevant.

Sound good?

Ok, as promised I'm going to give you a link to some free photoshop actions. If you're like me, you're cheap and don't feel like paying for actions. I've been trying forever to find an action that will replicate a vintage photo.

I found this website via the Pioneer Woman actions set on Flickr.

Actions

If you have trouble installing the actions or just don't know how she's included a link to explain everything. Trust me..If I can install them. So can you!

Installing

Here is one example of a picture I used her actions on.

The Original Pic:


Vintage Action: (I also cropped it)


Cool huh? I'll try to do more examples of the actions in a few days.